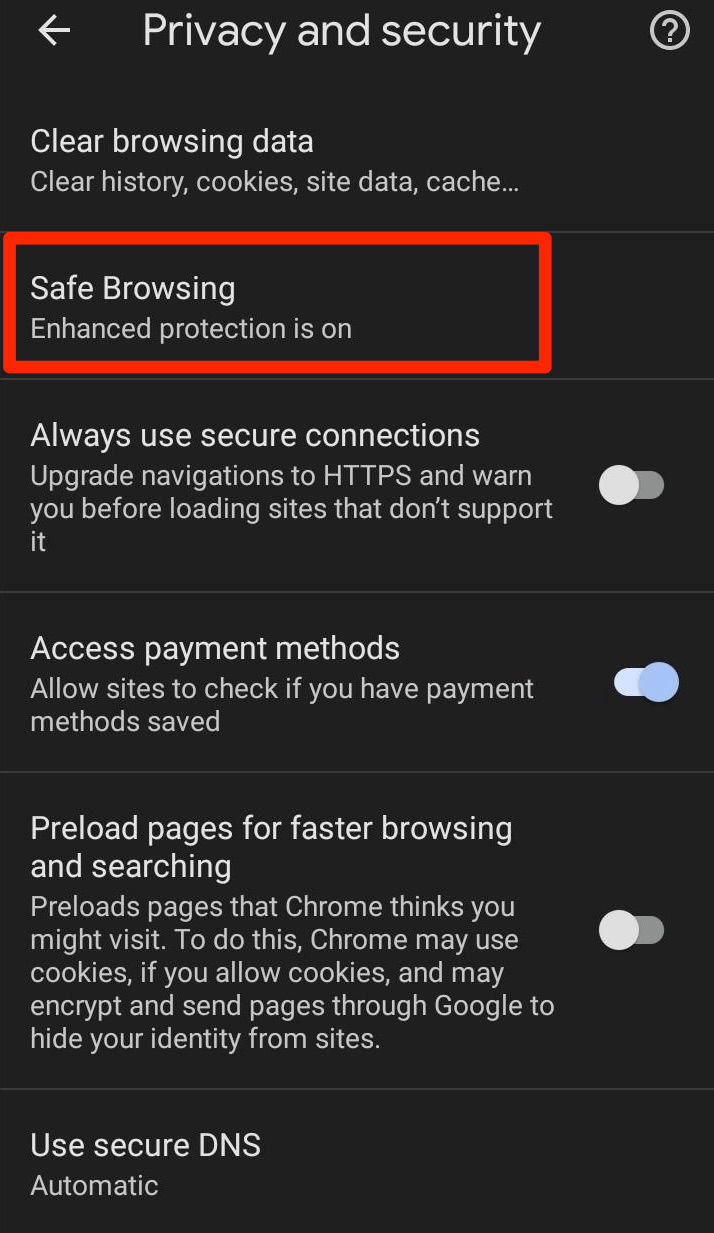
Chrome has introduced a cool feature for browsing to help you stay safe from malicious sites. To enable Safe Browsing in Google Chrome for Android, you need to go to the Settings menu. From there, open the Security and Privacy option and you will see an option to enable Safe Browsing. Enable that option and start Safe Browsing in Chrome.
Hackers can often trick users into opening risky websites that can drop malicious software onto their devices. To protect computers from such malware, the desktop version of Chrome is already equipped with Safe Browsing.
Now, Google has added this feature to the Android version of Chrome. So, Google Chrome for Android has the same secure browsing feature as the desktop version.

Recently, a close friend of mine unknowingly opened a malicious website while surfing the web. Then he received anonymous notifications, and many random websites opened automatically.
Panicked by this, he switched off his phone. He told me about the problem and suggested I turn on Safe Browsing in Chrome.
Enable Safe Browsing in Chrome settings
Chrome lets you choose the level of secure browsing through settings on Android devices. In this mode, you can easily enable Safe Browsing from Settings.
Here are the steps to enable Safe Browsing in Chrome for Android:
- Launch Google Chrome for Android mobile.
- Tap the menu icon and the vertical 3dots in the top right corner.

- Select the Privacy and Security tab menu.
- Open the Safe Browsing tab.
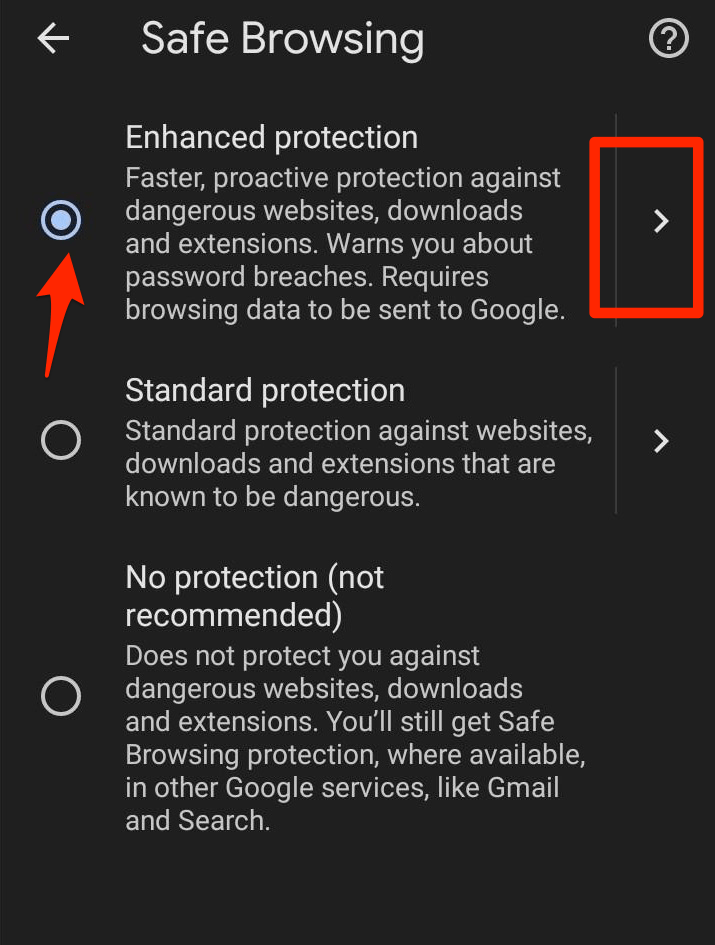
- Tap Enhanced security to enable safe browsing in Google Chrome for Android.

On the Safe Browsing tab, select the level of protection of your choice. Also, if you disable Safe Browsing, it will still be enabled for some Google services.
Disable HTTPS in Chrome Android :
Whenever you visit our site that is not secure, you may encounter the error This link is not secure – proceed with caution. However, if you don’t want to face this error, you can disable Secure Connection setting in Chrome Android.
Here are the steps to disable HTTPS connection verification in Chrome for Android:
- Launch Chrome for Android device.
- Also tap the vertical 3dots icon for the options menu.

- Select Settings from the menu list.
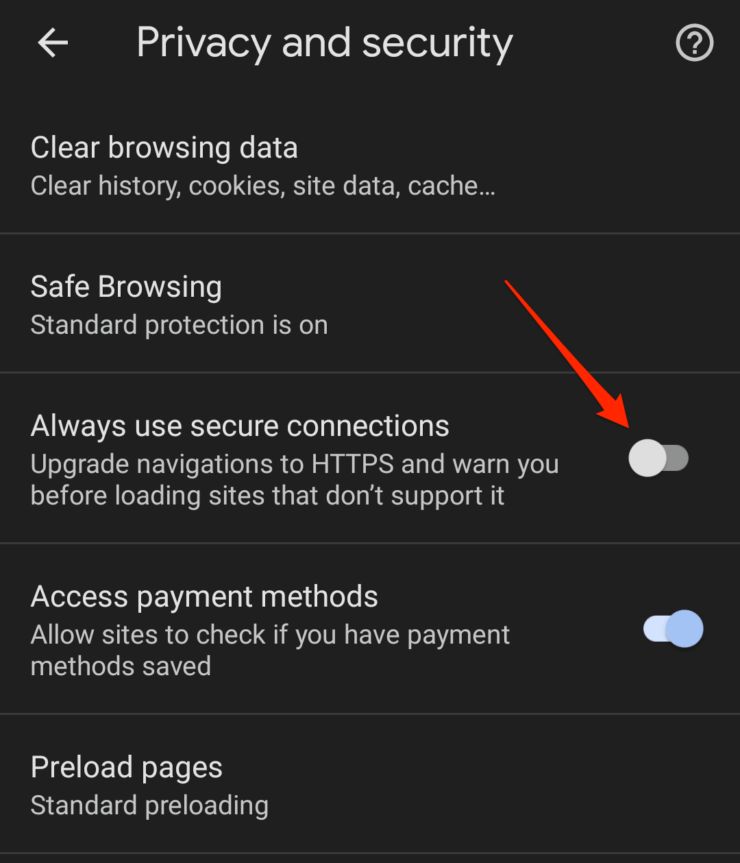
- Scroll down and tap the Privacy and Security tab.

- Tap the Always use secure connections option to disable the toggle option
Disabling this option will not highlight a secure or insecure connection. It is strongly recommended not to disable this option; Maybe you can temporarily disable it for one time use.
